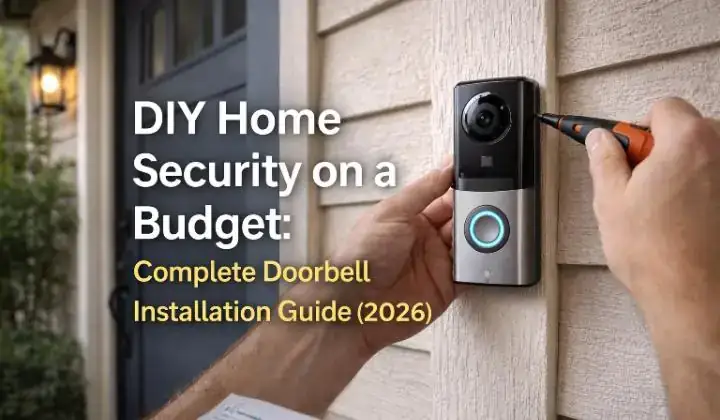
DIY Home Security on a Budget: Complete Doorbell Installation Guide (2026)
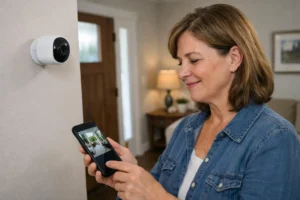
There is a moment you as a homeowners you experience at least once that you need diy home security on a budget on video doorbell— you hear a knock at your door, you are not expecting anyone, and before you even get up you feel that small knot of uncertainty in your stomach. Who is it? Are they still there? Is it safe to open the door?
I felt that exact feeling one evening when my doorbell rang at 9 PM and I had no way of seeing who was outside without physically opening the door or pressing my face against the window like a nervous cat. That night I decided something had to change. Within a week I had a video doorbell installed, and I have not answered my door blind since.
What surprised me most was how affordable and simple the whole process was. I spent less than $60, used tools I already had at home, and completed the installation in under 45 minutes. No electrician. No complicated wiring. No monthly fees.
This guide covers everything I learned — from choosing the right video doorbell on a budget to installing it correctly, setting it up properly, and avoiding the mistakes that caught me off guard the first time. Whether you are renting or own your home, this is completely achievable for anyone.
Why a Video Doorbell Is the Smartest First Step in Home Security
If I had to pick just one security device for a tight budget, it would not be a full alarm system or a CCTV camera. It would be a video doorbell. Here is why.
Your front door is the number one entry point burglars use. According to data from the Center for Problem-Oriented Policing at Arizona State University, over 34 percent of residential burglars enter through the front door. A video doorbell covers your single most vulnerable spot, records everyone who approaches it, and lets you speak to visitors remotely — all from your phone.
Beyond burglary, a video doorbell solves everyday problems that most people do not even realise are security risks:
- Package theft: You can speak to delivery drivers and direct them to safe drop locations even when you are not home
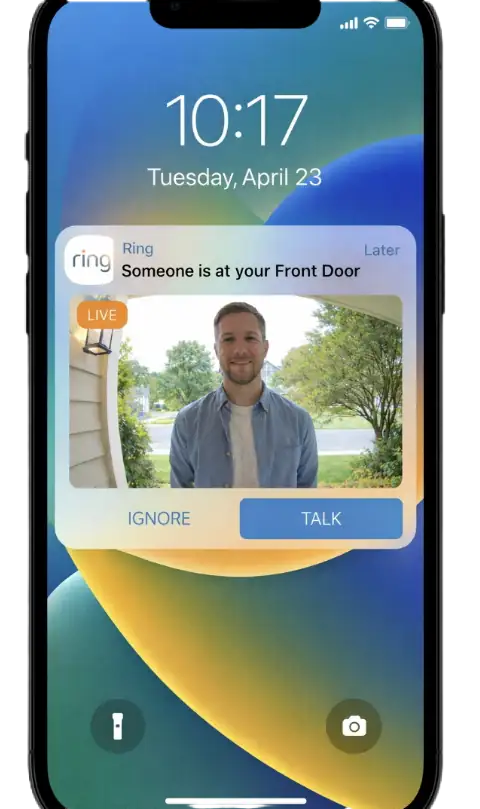
- Unexpected visitors: See and speak to anyone at your door without opening it or even being at home
- Suspicious activity: Motion alerts notify you when someone approaches your door before they even ring
- Children arriving home: Get an alert the moment your kids arrive back from school
- Solicitors and scammers: Speak through the doorbell without revealing you are home or alone
Before spending any money though, I always recommend checking your home’s specific vulnerabilities first. The free Home Burglary Risk Score tool takes about 5 minutes and tells you exactly which entry points on your property need the most attention. It might confirm the front door is your priority — or it might reveal a bigger weakness somewhere else.
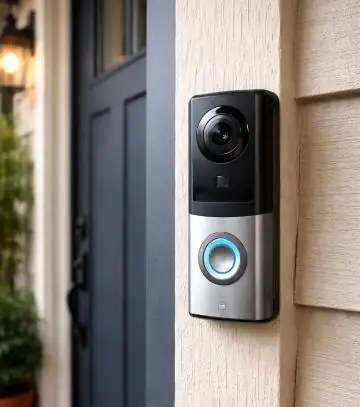
Wired vs Wireless Video Doorbells — Which One Is Right for You?
This is the first decision you need to make before buying anything. I got this wrong on my first attempt and ended up returning a doorbell because I bought wired when I needed wireless. Here is the difference in plain English:
| Factor | ⚡ Wired Doorbell | 🔋 Wireless/Battery Doorbell |
|---|---|---|
| Power Source | Existing doorbell wiring | Rechargeable battery |
| Installation Difficulty | Moderate (needs wiring) | Very easy (plug and mount) |
| Best For | Homeowners with existing doorbell | Renters or new installations |
| Reliability | Always on, no charging | Needs recharging every 1–3 months |
| Price Range | $40–$100 | $30–$80 |
| Renter Friendly | Not always | Yes |
| Monthly Fee | Optional | Optional |
My recommendation for most people: If you already have an existing wired doorbell at your front door, replace it with a wired video doorbell. It is more reliable and you never deal with a dead battery. If you do not have existing wiring or you are renting, go wireless — the installation is much simpler and you can take it with you when you move.
How to Check if You Have Existing Doorbell Wiring
This takes about 30 seconds and will save you from buying the wrong type. Here is how to check:
- Look at your current doorbell button — if it has a wire connecting it to the wall behind it, you have existing wiring
- Press your current doorbell — if a chime sounds inside your home, you almost certainly have low-voltage wiring that a wired video doorbell can use
- If there is no doorbell at all or your current button is completely wireless, you need a battery-powered video doorbell
- If you are unsure, remove the existing doorbell button carefully and look for two thin wires attached to the back — if they are there, you have wiring
I discovered I had existing wiring when I removed my old broken doorbell button. Two thin copper wires fell out of the wall and I realised I had been ignoring the easiest upgrade possible for three years. If you are in the same situation, a wired video doorbell replacement literally takes 15 minutes.
What to Look For in a Budget Video Doorbell
There are dozens of video doorbells available in 2026 and the price range is wild — from $25 all the way to $250. Here is what actually matters at the budget level and what is just marketing fluff:
Features That Actually Matter:
- 1080p video resolution minimum: Anything lower and you cannot identify faces clearly
- Wide angle lens: 160 degrees or wider to see the full area in front of your door
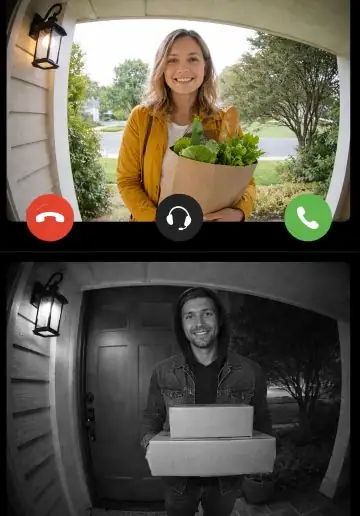
- Night vision: Essential — most incidents happen in low light conditions
- Two-way audio: Lets you speak to visitors through your phone from anywhere
- Motion detection alerts: Notifies you before someone even rings the bell
- Local storage option: SD card or NVR support so you avoid monthly fees
- Weather resistance: IP65 rating minimum for outdoor installation
Features You Can Ignore at the Budget Level:
- 4K resolution: Completely unnecessary for a doorbell — 1080p captures faces perfectly
- Facial recognition: Usually requires expensive subscription plans
- Built-in floodlight: Nice but adds significant cost — a separate motion light is cheaper
- Premium brand name: Budget cameras from lesser-known brands often perform identically to premium ones at half the price
For budget shopping in 2026, I recommend browsing the no-subscription video doorbell section on Amazon and filtering by customer rating. Look for cameras with at least 1,000 reviews and a 4-star rating or higher. This is a more reliable indicator of real-world performance than spec sheets.
Step-by-Step Video Doorbell Installation Guide
I have broken this into two separate paths — one for wired replacement and one for battery-powered new installation. Follow the path that matches your situation.
📌 Path A — Replacing an Existing Wired Doorbell
Step 1 — Turn Off the Power
Go to your home’s breaker box and switch off the circuit that powers your doorbell. If you are not sure which one it is, switch off the main breaker. Doorbell wiring runs at very low voltage (typically 16 to 24 volts) and is unlikely to hurt you, but it is always better to be safe before touching any wiring.
Step 2 — Remove the Old Doorbell Button
Unscrew the existing doorbell button from the wall. It is usually held by two small screws. Once removed, you will see two thin wires attached to the back. Unscrew them carefully and let them hang free. Put a small piece of tape around each wire end so they do not fall back into the wall — this is a frustrating mistake I made once and spent 20 minutes fishing the wire back out.
Step 3 — Attach the Mounting Bracket
Your new video doorbell comes with a mounting bracket. Hold it against the wall in the same position as your old doorbell, feed the wires through the central hole, and screw it firmly into place. Most brackets come with wall anchors if you are mounting into masonry or brick.
Step 4 — Connect the Wires
Attach the two wires to the terminals on the back of your new video doorbell — one wire per terminal. It does not matter which wire goes to which terminal on most models. Tighten the screws firmly so the wires cannot pull out. This is the only genuinely technical step and it takes about 60 seconds.
Step 5 — Attach the Doorbell to the Bracket
Snap or slide the doorbell unit onto the mounting bracket according to the manufacturer’s instructions. Restore power at the breaker box. The doorbell should power on immediately.
📌 Path B — Installing a Battery Powered Doorbell from Scratch
Step 1 — Charge the Battery Fully First
Before mounting anything, charge the doorbell battery completely using the included USB cable. This usually takes 4 to 6 hours. Skipping this step means your doorbell dies within a day of installation and you have to unmount it to charge it — not a fun experience.
Step 2 — Choose the Right Position
Mount the doorbell at chest to shoulder height — roughly 1 to 1.2 meters from the ground. This height captures faces most clearly and covers the area immediately in front of your door. Higher than this and you capture the tops of people’s heads. Lower and you get a lot of feet and not much face.
Step 3 — Mount the Bracket
Use the included screws and wall anchors to fix the mounting bracket to the wall. For renters who cannot drill, most battery doorbells also come with strong adhesive strips. I used the adhesive option when I was renting and it held perfectly for 14 months without any movement.
Step 4 — Attach the Doorbell and Set Up the App
Snap the doorbell onto the bracket, download the app, create an account, and follow the setup wizard to connect to your home WiFi. The app will walk you through every step. Name your doorbell “Front Door” rather than leaving it as the default device name.
Step 5 — Set Up Your Indoor Chime
Battery doorbells do not connect to your existing indoor chime. Instead they use the app to notify you. If you want an actual chime sound inside your home, most brands sell a plug-in indoor chime unit for $10 to $20 extra. Just plug it into any wall socket and pair it with the doorbell through the app. I bought one for my bedroom so I can hear the doorbell even when my phone is on silent.
Getting the Most Out of Your Video Doorbell App
Installing the doorbell is only half the job. How you set up the app determines whether your doorbell is genuinely useful or just an expensive novelty that sends you 300 useless notifications a day. Here is what I configure on every doorbell I install:
- Set a custom motion zone: Draw a detection zone covering only your doorstep and path — not the street or a neighbor’s garden. This alone eliminates 90 percent of false alerts.
- Adjust motion sensitivity: Start at medium sensitivity. If you still get too many alerts, reduce it. If you are missing real events, increase it.
- Set activity zones by time: Some apps let you only receive alerts during certain hours. I disable motion alerts between 6 AM and 8 PM on weekdays when I expect regular foot traffic.
- Enable pre-roll recording: Some doorbells record a few seconds before motion is detected. This captures someone approaching before they reach the camera’s main field of view.
- Turn on person detection if available: This filters out animals, blowing leaves, and passing cars — only alerting you when a person is detected.
- Set up quick reply messages: Most apps let you set automated voice replies like “We will be right there” or “Please leave the package at the door” that play automatically when someone rings.
How to Store Footage Without Paying Monthly Fees
This is the part that catches most people off guard. You buy a doorbell for $50, get it working perfectly, and then realise you need a $3 to $10 per month cloud subscription just to view your recorded footage. Here is how to avoid that:
- MicroSD card slot: Many budget doorbells include a microSD card slot. A 32GB card ($6 to $10) stores several days of motion clips locally with zero monthly fee.
- Free cloud tier: Brands like TP-Link Tapo and Reolink offer free cloud storage for 24 to 48 hours of motion events — enough for most everyday needs.
- NAS storage: If you already have a home network storage device, some doorbells can save footage directly to it over your local network.
- Manual download: For cameras without local storage, you can manually screenshot or screen-record important footage from the app before it expires.
I personally use a doorbell with a microSD card slot and a free 24-hour cloud backup. Combined, this gives me local storage that never expires plus a cloud backup in case someone steals or damages the doorbell itself. Total extra cost: $8 for the SD card. Zero monthly fees.
To understand the full cost of setting up your doorbell alongside a complete home security system, use the free Home Security Cost and Setup Calculator — it gives you a personalised breakdown based on your home size and the devices you plan to use.
Mistakes I Made Installing My First Video Doorbell
I want to save you the frustration I went through. These are the mistakes I made personally — not things I read about somewhere else:
- Buying wired when I needed wireless: I assumed I had existing wiring without checking. I did not. Wasted a return trip and three days waiting for a replacement.
- Mounting too high: My first attempt was at 1.8 meters. The footage showed the tops of people’s heads and not much else. The sweet spot is 1 to 1.2 meters.
- Not configuring motion zones: Got 400 notifications on day one from passing cars. Spent an evening turning the whole thing off in frustration before I figured out motion zones existed.
- Weak WiFi at the front door: My router was at the back of my house. The front door had barely one bar of signal. The live view kept buffering and the doorbell kept dropping offline. Fixed it with a $25 WiFi extender.
- Forgetting to charge before mounting: Mounted the doorbell, ran all the way back inside to set it up on the app — battery was at 12 percent. Had to unmount it and wait 5 hours to charge it. Charge it first.
- Not testing the two-way audio volume: My doorbell’s speaker was very quiet. Visitors could not hear me speaking through it clearly. Found the volume setting in the app after a week of people standing confused at my door.
Complete Budget Doorbell Installation Cost Breakdown
Here is a realistic breakdown of what the complete setup costs. I have included everything — not just the doorbell itself:
| Item | Budget Option | Mid Option | Notes |
|---|---|---|---|
| Video Doorbell | $30–$50 | $60–$100 | 1080p minimum |
| MicroSD Card (32GB) | $6–$10 | $10–$15 | For local storage |
| Indoor Chime Unit | $10–$15 | $15–$25 | Optional but recommended |
| WiFi Extender | $20–$30 | $30–$50 | Only if signal is weak |
| Mounting Hardware | $0 | $0 | Usually included |
| Monthly Fee | $0 | $0 | Using local storage |
| Total Cost | $46–$75 | $85–$140 | One-time payment |
Pairing Your Doorbell With a Complete Home Security System
A video doorbell is a great starting point but it is just one layer of protection. The homes that burglars consistently avoid are the ones that have multiple visible security measures working together — a doorbell, CCTV cameras, an alarm system, and reinforced entry points.
I cover the full CCTV camera installation process in my guide on DIY Home Security on a Budget: Complete CCTV Installation Guide and the full alarm system setup in the Complete Alarm Installation Guide. Together these three guides give you everything you need to build a complete DIY security system for under $400 total.
Research from the National Criminal Justice Reference Service consistently shows that the presence of multiple visible security measures is far more effective at deterring burglary than any single device alone. A doorbell camera plus a visible alarm system sign plus outdoor lighting creates a combination that most opportunist burglars are simply not willing to risk.
Not sure where to start or what combination of devices your home needs? The free Home Security Checklist Generator builds a personalised security plan for your specific home in under 3 minutes — no sign-up required.
❓ Frequently Asked Questions
Can I install a video doorbell if I am renting?
Yes. Battery-powered doorbells can be installed using adhesive strips with no drilling required. They are completely removable and leave no damage behind. I used adhesive strips when I was renting and the doorbell stayed firmly in place for over a year. When I moved out I simply peeled it off cleanly.
How long does a battery-powered doorbell last on one charge?
Most battery doorbells last between 1 and 3 months per charge depending on how much activity your front door gets. A busy household where the doorbell is triggered multiple times daily will drain the battery faster than a quiet home. Most doorbells send a low battery notification through the app before they die completely.
Do I need to pay a monthly fee for a video doorbell to work?
No. The live view, two-way audio, and motion alerts all work without any subscription on most budget doorbells. The monthly fee is only for cloud video storage — and as I covered above, you can avoid this entirely by using a local MicroSD card or the free storage tier that most brands offer.
What happens if someone steals my video doorbell?
Most doorbells record footage before they are removed — capturing the face of anyone tampering with them. If you use cloud storage, that footage is already saved remotely and cannot be deleted even if the doorbell is taken. For extra protection, use the security screw that most doorbells include to prevent the unit from being easily unclipped from its bracket.
How far away can I be and still use the two-way audio?
As long as you have a mobile data or WiFi connection on your phone, you can use the two-way audio from anywhere in the world. I have spoken to delivery drivers at my front door while sitting in a different country. The only limiting factor is your internet connection speed — a slow connection causes slight audio delay.
Final Thoughts — Stop Answering Your Door Blind
A video doorbell is the single most impactful security upgrade most homes can make for under $60. It closes the biggest vulnerability most homes have — the front door — and gives you visibility and control over who approaches your home 24 hours a day.
The installation is genuinely simple. I have walked complete beginners through this process and watched them go from unboxing to fully operational in under 45 minutes. If you have been putting it off because it seems complicated or expensive, I promise you — it is neither.
Pick the right type for your home — wired if you have existing doorbell wiring, battery if you do not. Buy from a brand with solid app reviews. Spend 10 minutes setting up your motion zones properly. That is genuinely all it takes.
Start tonight. And if you are not sure where your biggest security weaknesses actually are, take the free Home Burglary Risk Score assessment before you spend a single dollar — it takes 3 minutes and gives you a clear picture of exactly where to focus first.
📚 Build Your Complete Home Security System:

Borni Franklin is the founder of LotsHomeGuide and a home security researcher with over 5 years of experience studying real-world burglary patterns, property vulnerabilities, and practical protection strategies. He has tested home security products, analyzed how intruders select targets, and built free tools to help everyday homeowners assess and improve their safety. Every article on LotsHomeGuide is written from hands-on research — not recycled generic advice. Based in the USA. Read full information about Borni Franklin on our About Us page.