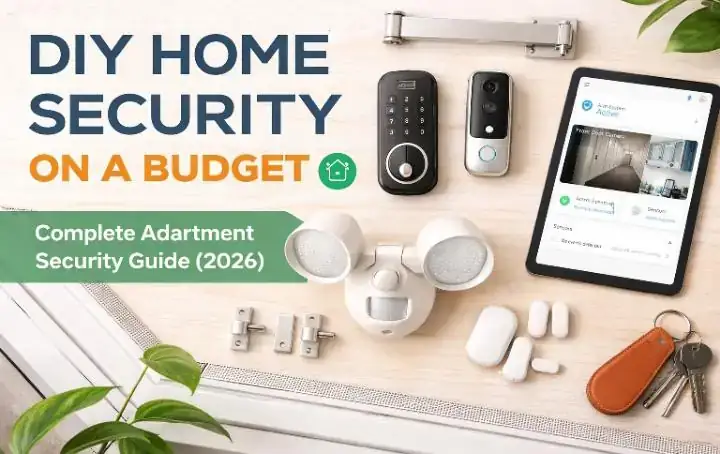
DIY Home Security on a Budget: Complete Apartment Security Guide (2026)
How I secured my apartment without breaking the bank — and what actually works.
Let me be honest and real with you. The first time I got my apartment was exciting — but also the first time I seriously thought about how easy it would be for someone to just walk in. My front door had a basic lock, there was a ground-floor window right by the entrance, and the parking lot outside was pitch dark at night. I didn’t have a few thousand dollars sitting around for a professional security company, and I wasn’t about to sign a two-year monitoring contract.
So I did what I always do. I researched, tested, and figured it out myself. After spending weeks looking into apartment security setups and testing what actually works, I put together this guide for renters and apartment dwellers who want real protection — on a real budget.
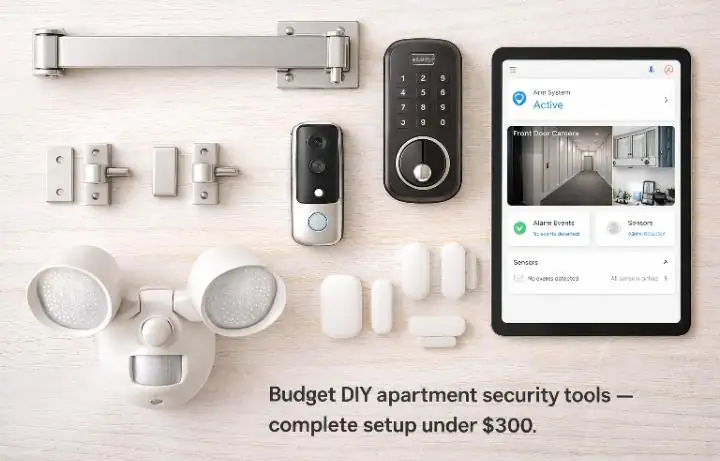
This is not a “buy a Ring doorbell and call it a day” post. I’m going to walk you through every layer of apartment security, from the door to the windows to the digital side of things, and show you exactly how to build a solid system for under $300 — or even less, if you start small.
Why Apartment Security Is a Different Problem
Most security advice online is written for homeowners. They talk about drilling into walls, wiring cameras into a breaker box, and setting up a full perimeter. If you’re renting an apartment, that advice is mostly useless — and your landlord would not be happy about it anyway.
The good news is, apartment security is actually more manageable than a house. You have fewer entry points, less perimeter to cover, and since you’re living closer to neighbors, help is generally nearby. The bad news is that most apartments have hollow-core doors, basic locks, and shared entry points that you don’t fully control.
The approach I’ll walk you through focuses on these key principles:
- ▸No permanent modifications — nothing that can’t be undone when you move out
- ▸Layered security — multiple barriers so that even if one fails, others hold
- ▸Visibility and deterrence first — most burglars don’t want a fight, they want an easy target
- ▸Smart spending — put money where it actually stops threats, not just looks good on a shelf
“Burglars typically spend less than 60 seconds deciding whether to target a home. Your job is to make sure in those 60 seconds, your apartment looks like too much trouble.”
Before you spend a single dollar, I’d recommend running a quick assessment of where you actually stand. The Home Vulnerability Scanner is a free tool that walks you through a real-life security audit of your space. It takes about 5 minutes and tells you exactly where your weak points are.
Step 1 — Secure the Front Door (Your Biggest Vulnerability)
Over 60% of break-ins happen through the front door. Not because burglars pick the lock — that’s a movie thing. They kick it in. Most standard apartment doors can be kicked open in one solid hit because the door frame is weak, not the lock. Here’s how I reinforced mine without drilling a single permanent hole.
Door Reinforcement Bar
A door security bar costs between $25–$60 and wedges under your door handle, bracing against the floor at an angle. When someone tries to kick the door in, the bar absorbs and redirects that force into the floor. It’s simple, it’s effective, and it works on both inward-opening doors and sliding doors.
I keep mine deployed every night and anytime I’m home. It takes two seconds to set up or remove.
Door Frame Reinforcement
If you’re allowed to make minor changes, a door frame reinforcement kit (like the Door Armor MAX) runs about $100–$150 and wraps the strike plate area with heavy steel. Most kick-in attacks break the door frame, not the lock itself, so reinforcing the frame makes a massive difference. Ask your landlord — many will agree since it protects the property.
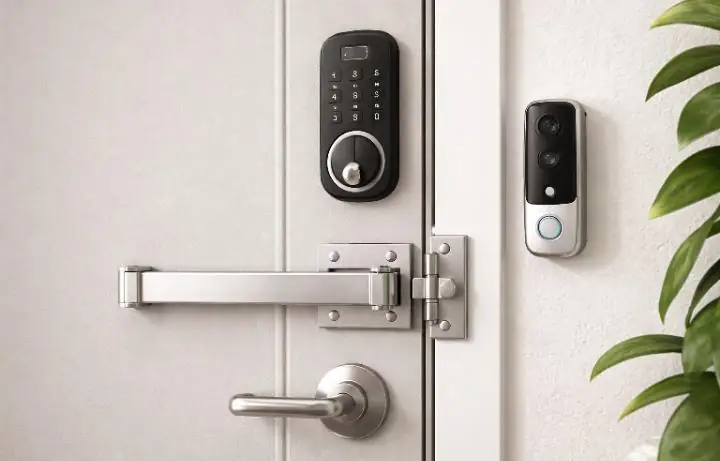
Smart Lock or Deadbolt Upgrade
Most apartments come with a Grade 3 deadbolt — the lowest quality. A Grade 1 deadbolt upgrade (like the Schlage B60N) costs about $40–$55 and is noticeably stronger. Smart locks like the Schlage Encode or Yale Assure SL give you keypad entry, which means no more hidden spare keys and you can create temporary codes for guests.
Video Doorbell
A doorbell camera is one of the best deterrents available, and it works even if it never catches a single burglar on video. Studies show that just the presence of a visible camera makes most opportunistic thieves move on. I put together a full walkthrough on how to install one without permanent wiring — check the complete doorbell installation guide for 2026 if you want the step-by-step.
Step 2 — Windows and Sliding Doors
Windows and sliding glass doors are the second most common entry point. They’re often overlooked because people assume windows are too visible for someone to use — but at night, from a corner unit, or from a ground floor, they’re easy targets.
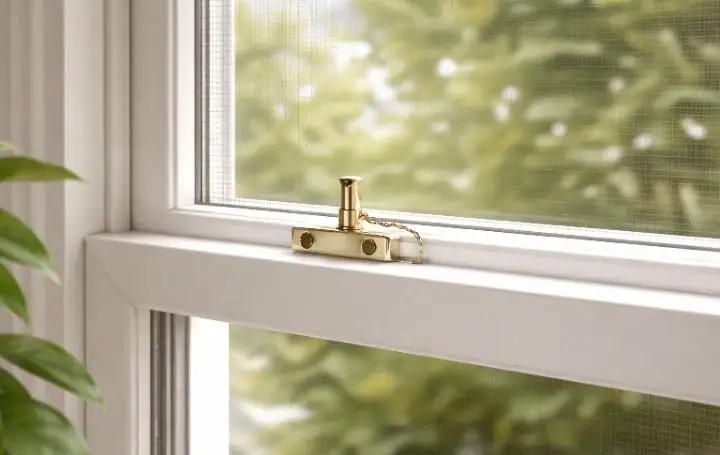
Window Locks and Pins
The factory latch on most apartment windows is laughably weak. A $5 window sash lock or a simple key pin (a bolt that goes through both the lower and upper sash) makes it almost impossible to slide the window open from outside. I put these on every window in my apartment.
Window Security Film
Security film doesn’t stop someone from breaking a window — but it holds the glass together so they can’t reach through. A roll runs $20–$50 and you just cut it to size and apply it like a sticker. It also blocks UV light, which is a nice bonus.
Sliding Door Bar
A cut-down broom handle in the track of a sliding door is the classic trick, but purpose-made sliding door bars are better and cost under $20. They also prevent the door from being lifted out of the track, which is a lesser-known vulnerability in older sliding door frames.
Step 3 — Add Cameras Without Permanent Installation
You do not need to hire an electrician or run cables through your walls to set up a proper camera system in an apartment. Battery-powered and wire-free cameras have become genuinely excellent in the last two years, and they go up in minutes.
Here is what I look for in an apartment-friendly security camera:
- ▸Battery or USB-powered (no wiring)
- ▸1080p or higher resolution
- ▸Motion detection with push notifications
- ▸Night vision (infrared or colour night)
- ▸Local storage option (SD card) so you’re not paying a monthly cloud fee
- ▸Two-way audio — useful for talking to someone at the door
Good options in 2026 include the Eufy 2C Pro, Wyze Cam v3, and the Reolink Argus series. Most run $30–$90 per camera. I have a full breakdown on placement and setup in the complete CCTV installation guide — it covers angles, positioning, and how to set up motion zones so you’re not getting a notification every time a car drives past.
Where to Place Cameras in an Apartment
The most useful spots I’ve found, in order of priority:
-
1
Front door — facing out, angled to capture faces approaching -
2
Main window or balcony door — especially if ground floor or accessible -
3
Inside, facing the front door — a secondary camera inside captures anyone who does get in -
4
Shared hallway (check local laws and building rules before placing cameras outside your unit)
Step 4 — Motion Sensor Lights Are Underrated
Most people skip motion lights when they’re renting an apartment because they assume it only works outdoors. But there are excellent indoor and porch-mountable motion lights that require zero wiring and plug into any outlet — or even run on batteries.
A sudden bright light is a powerful deterrent. It signals to anyone approaching that they’ve been noticed, it makes it harder to move around in the dark, and it triggers neighbours to look out their windows. I wrote a full post reviewing the best affordable options — check out the 7 best motion sensor lights to deter burglars if you want specific product recommendations.
For apartments specifically, I suggest:
- ▸A plug-in motion light near the front door, aimed at the entry
- ▸Battery-powered stick-up lights near ground floor windows
- ▸A light timer on a lamp inside — makes the apartment look occupied even when you’re out
Step 5 — Alarms and Sensors
Even a basic alarm does two things: it scares off an intruder and it alerts your neighbours. You don’t need a professional monitoring system to get value from an alarm. There are simple, self-contained options that work really well for apartments.
Door and Window Contact Sensors
These are small magnetic sensors — one part goes on the door frame, the other on the door itself. When the door opens and the magnets separate, it triggers an alert. You can get a pack of 4 for around $20–$30. They pair with a hub (like Google Home, Alexa, or a standalone security hub) to send you a phone notification.
Glass Break Detectors
These listen for the specific frequency of breaking glass and trigger an alarm. One detector covers an entire room in most apartments. They cost $15–$40 and are one of the cheapest ways to cover window entry points without installing anything on the window itself.
Personal Security Alarm
A 120-decibel personal alarm doubles as a door/window alarm — just hang it on the door handle so if anyone opens the door, the pin pulls and it screams. Cost: under $10. Not sophisticated, but brutally effective in an apartment building where neighbours are close by.
Complete Budget Breakdown
Here’s a realistic cost breakdown depending on how thorough you want to be:
| Security Layer | Item | Est. Cost | Priority |
|---|---|---|---|
| Door Security | Door security bar | $25–$50 | High |
| Door Security | Grade 1 deadbolt upgrade | $40–$60 | High |
| Door Security | Video doorbell (battery) | $50–$100 | High |
| Windows | Window sash locks (4-pack) | $10–$20 | High |
| Windows | Window security film | $20–$50 | Medium |
| Windows | Sliding door bar | $15–$25 | High |
| Cameras | Battery camera x2 | $60–$160 | Medium |
| Lighting | Motion sensor light x2 | $20–$50 | Medium |
| Alarms | Door/window contact sensors | $20–$35 | Medium |
| Alarms | Glass break detector | $15–$40 | Optional |
| Total Range | $275 – $590 (full setup) | — | |
If budget is tight, start with the High priority items — door bar, deadbolt, window locks, and a doorbell camera. That gets you about 80% of the protection for roughly $125–$230. You can add the rest over time.
🔢 Get an Accurate Cost Estimate for Your Setup
Not sure exactly what you need or what it’ll cost? Use the Home Security Cost Calculator to get a personalised breakdown based on your apartment size and priorities.
Apartment-Specific Security Risks to Know About
Beyond the obvious door and window stuff, there are a few apartment-specific risks most guides completely ignore. I want to flag these because I’ve seen them come up over and over.
Shared Entry Points
Most apartment buildings have a main entrance that requires a key fob or code, but in practice people prop doors open, hold them for strangers, or the locking mechanism breaks and takes weeks to fix. The main building door is not your security perimeter — your own apartment door is. Treat it like you’re the last line of defence.
Package Theft
Package theft (porch piracy) has become a major issue in apartment buildings. A good doorbell camera helps document it, but the better solutions are a package lockbox near your door or requesting that deliveries require a signature. Some buildings also have dedicated package lockers — if yours does, use them.
Social Engineering
A surprising number of apartment crimes involve someone simply knocking on the door and talking their way in — or tailgating someone into the building. Never let someone you don’t recognise into the building behind you, and use your door viewer or doorbell camera before opening up to strangers. This sounds obvious, but people are polite and it’s surprisingly easy to exploit.
Knowing Your Neighbourhood Risk Level
Your security setup should match the actual risk level of your area. A ground-floor unit in a high-crime neighbourhood needs more protection than a 4th floor apartment in a quiet suburb. I always recommend running your address through the Neighbourhood Risk Intelligence Tool before deciding how much to invest in security. It gives you an evidence-based picture of your environment’s risk level.
Comparison: DIY vs Professional Monitoring
I get asked a lot whether it’s worth paying for a professional monitoring service like ADT or SimpliSafe. Here’s my honest take on the trade-offs:
| Factor | DIY Self-Monitored | Professional Monitoring |
|---|---|---|
| Upfront cost | $125–$400 | $200–$600+ |
| Monthly cost | $0 (or $3–$5 for cloud) | $15–$60/month |
| Response time | You get notified, you call 911 | Monitoring centre calls police for you |
| False alarm risk | You manage it | Potential fines in some cities |
| Renter-friendly | Yes — fully portable | Depends on equipment |
| Contract required | Never | Often 2–3 years |
| Best for | Budget-conscious renters | People who want hands-off protection |
For most renters, DIY self-monitoring is the smarter move. You keep control, you pay no monthly fees, and modern cameras and sensors are good enough that you get a notification on your phone the moment anything happens. The only scenario where I’d recommend professional monitoring is if you travel frequently for weeks at a time and genuinely won’t be able to respond quickly.
If you want to understand exactly how vulnerable you currently are, this Home Burglary Risk Score calculator is worth a few minutes. It gives you a score based on your specific situation — property type, location factors, existing security measures — and tells you what would move the needle most.
Building a Security Habit, Not Just a Security Setup
Hardware is only half the equation. The other half is behaviour. I see this all the time — people spend $300 on a setup and then leave their window cracked every morning when they go to work, or leave their spare key under the doormat “just in case.”
A few habits that make a real difference:
- ▸Lock your door every single time you leave, even for five minutes
- ▸Close and lock windows when you’re not home — a breeze isn’t worth the risk
- ▸Don’t post your holiday plans on social media until after you’re back
- ▸Know your neighbours — a mutual watch arrangement is free and highly effective
- ▸Check your camera footage once a week to catch patterns before they become incidents
- ▸Vary your routines — predictable schedules make you a more attractive target
“The best security system in the world is useless if you leave the door unlocked. Habits matter as much as hardware.”
Free Tools to Audit and Track Your Security
I’ve built out a set of free tools specifically for people who want to assess and improve their home security without paying for a consultant. Here are the ones most relevant to apartment renters:
These tools are free to use and don’t require any signup. I built them because I kept answering the same questions over and over from people who had no idea where to start. If you’re new to home security, the checklist generator is the best starting point — it builds a personalised to-do list in under two minutes.
What Experts Actually Say About Deterrence
There’s been solid academic research on what actually deters residential break-ins. A frequently cited study by researchers at the University of North Carolina surveyed convicted burglars and found that most cased their targets for signs of occupancy, lighting, and visible security measures before making a move. The presence of cameras or alarm system signage was enough to make the majority move on to an easier target.
For a practical read on home security frameworks and risk, the CISA Physical Security guidelines are surprisingly accessible — they cover layered security principles that apply just as well to a one-bedroom apartment as they do to an office building.
The UK’s Metropolitan Police burglary prevention advice is another worthwhile read — they specifically address rental properties and what works without permanent modifications.
Final Thoughts
Apartment security doesn’t have to be complicated or expensive. The truth is that most break-ins are crimes of opportunity — somebody looking for an easy target. Making your apartment obviously not an easy target is 80% of the work.
Start with the door. Add window locks. Put up a camera. Use your chain lock when you’re home. And take 5 minutes to run through the free security audit tools above so you know exactly where your gaps are. That’s it. You don’t need a professional installer, you don’t need a monthly contract, and you don’t need to spend more than a couple hundred dollars to be meaningfully safer.
Security is one of those things where doing something — anything — is dramatically better than doing nothing. A $25 door bar and a $10 pack of window locks might be the most valuable $35 you ever spend.

Borni Franklin is the founder of LotsHomeGuide and a home security researcher with over 5 years of experience studying real-world burglary patterns, property vulnerabilities, and practical protection strategies. He has tested home security products, analyzed how intruders select targets, and built free tools to help everyday homeowners assess and improve their safety. Every article on LotsHomeGuide is written from hands-on research — not recycled generic advice. Based in the USA. Read full information about Borni Franklin on our About Us page.