How to Create a Family Safety Plan for Emergencies
The honest, practical guide I wish existed before I actually needed one.
A solid family safety plan for emergencies is the one thing most families talk about creating but never actually sit down and do. I was the same. I kept telling myself we’d get to it after the weekend, after the holidays, after the kids’ school term. And then the neighbourhood power went out for three days after a storm, and I realized we had no plan, no meeting point, no list of who to call — nothing.
What I found when I started researching was that almost every guide online covers the same surface-level advice: pack a go-bag, know your exits, have a meeting spot. That’s fine as a starting point, but it doesn’t cover the real-life stuff — the gaps that only show up when something actually goes wrong. Things like what happens when a family member is at a different location, or how to handle a situation where your child knows the plan but freezes anyway.
So I built this guide differently. This is everything I’ve learned from actually testing a family safety plan for emergencies in real conditions — not just writing it down. Whether you’re starting from scratch or updating something you put together years ago, this will give you a framework that actually holds up when stress is high and time is short.

Why Most Family Safety Plans for Emergencies Fail
Before we get into what to do, I want to be honest about why most family safety plans for emergencies don’t actually work when tested. It’s not because families don’t care — it’s usually one of these reasons:
- ▸The plan was written, not practiced. A plan that lives in a drawer is not a plan — it’s a document. If your kids have never walked through what to do, they won’t remember it under pressure.
- ▸It assumes everyone is home. Most plans are built around the scenario where the whole family is together. What about a Tuesday afternoon when kids are at school and parents are at work?
- ▸It only covers one type of emergency. A fire drill plan and a severe weather plan are not the same. Neither is a home intrusion plan. Each needs its own response logic.
- ▸It goes out of date. Phone numbers change. Kids grow up and get their own phones. Neighbours move. A plan from three years ago has gaps you haven’t noticed yet.
- ▸It underestimates stress response. Even adults freeze, misremember, or panic under real threat. Your plan needs to be simple enough that it works when nobody is thinking clearly.
Keeping these failure points in mind is what makes the difference between a family safety plan for emergencies that sits in a folder and one that your whole household can actually execute.
“A plan your family hasn’t practiced is just a list of good intentions. The goal is to make the right response feel automatic — not something anyone has to think about.”
Step 1 — Map Your Real-Life Emergency Scenarios First
The first thing I do when building a family safety plan for emergencies is list out every scenario that is actually relevant to my household — not just generic threats. Your list will look different depending on where you live, the ages of your children, and whether anyone in your home has a medical condition or mobility limitation.
Here are the scenarios most families need to plan for, grouped by type:
| Category | Scenarios to Plan For | Priority |
|---|---|---|
| Home Threats | House fire, gas leak, home intrusion, carbon monoxide | Critical |
| Natural Events | Severe storms, flooding, earthquake, extended power outage | Critical |
| Separation Scenarios | Child at school during emergency, parent unreachable, split locations | High |
| Medical Events | Cardiac event, allergic reaction, sudden injury, mental health crisis | High |
| Community Events | Neighbourhood evacuation, civil unrest, lockdown order | Moderate |
This table is your starting framework. Cross off what doesn’t apply to your area and add anything specific to your household. Living near a river? Flooding jumps to Critical. Have a family member with a severe allergy? Medical events need a dedicated sub-plan with very specific steps.
Step 2 — Build Your Communication Tree (Not Just a Contact List)
Every family safety plan for emergencies needs a communication structure — but most families stop at “save important numbers in your phone.” That’s not enough. Phones die, networks go down, and kids under pressure often can’t find the right contact even if it’s right there.
What I use instead is a communication tree: a logical chain of who calls who, in what order, using what method. Here’s the structure that works well for most households:
Primary Contact Hierarchy
-
1
Call the primary parent/guardian — the one most likely to be reachable and mobile during the day -
2
If unreachable, call the secondary parent or designated family emergency contact — someone outside the household, like a grandparent or close relative -
3
If both unreachable, go to the neighbourhood contact — a trusted neighbour who knows your family and has been briefed in advance -
4
If phones are down, go to the pre-agreed meeting location — no calls needed, just go there
The neighbourhood contact is the piece most families skip and it’s actually one of the most valuable. When phones are jammed or power is out, having a trusted person physically nearby who knows your situation is worth more than any app. I brief our neighbourhood contact annually — literally a 10-minute conversation to make sure they have current numbers and know which scenarios they’re being asked to help with.
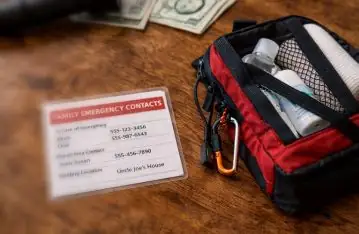
What to Include in a Printed Contact Card
Each family member should carry a physical card (laminated is better) with these details:
- ▸Full name and home address
- ▸Primary parent mobile number
- ▸Secondary contact (outside the home) name and number
- ▸Family meeting location address
- ▸Any critical medical info (allergies, medication, blood type)
- ▸Local emergency services number (beyond just 911 — include poison control, local hospital)
I keep one card in each person’s school bag or wallet, one taped inside the front door, and one in the family emergency kit. Low-tech, but it works when nothing else does.
Step 3 — Define Your Meeting Points (Two of Them, Not One)
Almost every family safety plan for emergencies mentions a meeting point. What most don’t mention is that you need two — and they need to serve different scenarios.
Meeting Point 1: Close Proximity (Immediate Threats)
This is for situations where you need to get out of the house fast — fire, gas leak, structural damage. It should be close enough to reach in under 2 minutes on foot. Most families use a specific spot on the street outside (a lamppost, the driveway end, the neighbour’s front gate). The key is that it’s specific, not just “outside.” Everyone should be able to find it in the dark, in a panic, with no phone.
Meeting Point 2: Away from Home (Wider Emergencies)
This is for situations where you can’t go home or the neighbourhood itself is affected — flooding, evacuation order, major power grid failure. This should be at least a 10–15 minute drive away, somewhere everyone can reach independently if they need to. Good options include a relative’s home, a community centre, or a library in a nearby suburb. The location should be consistent — don’t change it unless you communicate the change clearly to everyone.
Step 4 — The “Separated Family” Protocol (The Part Everyone Forgets)
This is the part of a family safety plan for emergencies that I almost never see covered properly. What happens when an emergency occurs and your family isn’t together? Not when you’re all home — but when kids are at school, a parent is travelling, or someone is at a medical appointment across town?
I’ve broken this into three sub-scenarios that each need their own response:
When a Child Is at School
Most schools have lockdown and evacuation protocols — but they may not align with your plan. I recommend having a conversation with your child’s school to understand their exact procedure and how they communicate with parents during an emergency. Then sync that with your own family’s response.
Your child should know: do not leave the school without an authorised adult. They should also know which adults besides parents are authorised to pick them up, and that adult’s name and face should be familiar.
When a Parent Is Travelling
If one parent travels regularly, the family safety plan for emergencies needs a version that works with just the other parent at home. That means the at-home parent knows where the emergency kit is, knows the contact tree, and has already told the kids what to do. The travelling parent should also have a plan for how to stay reachable and what to do if they can’t get home quickly.
When Communication Fails Entirely
Every member of the household — including children old enough to understand — should know the rule: if you can’t reach anyone, go to Meeting Point 2 and wait. Not indefinitely, but for a specific agreed window. We use 4 hours as our window. After that, we go to a pre-agreed extended contact (a family member in another city) who becomes the coordination hub.
Step 5 — Your Emergency Kit (What Actually Matters)
The go-bag list online is always the same 40 items and half of them are things you’ll never use. I’ve stripped mine down to what has actually proven useful, organised by how long you might need to sustain your household independently.
| Duration | Essential Items | Notes |
|---|---|---|
| 0–2 Hours | Flashlight, phone charger (power bank), first aid kit, printed contact card, cash (small bills) | Keep this near the front door or in a bag you can grab in 30 seconds |
| 2–24 Hours | Water (1 litre per person), energy bars, medication (3-day supply), copies of IDs and insurance docs, spare keys | Rotate food/water every 6 months. Medication list is critical for medical emergencies |
| 1–3 Days | Extended water supply (4 litres per person per day), non-perishable meals, warm clothing, blankets, basic tools (multi-tool, duct tape, rope) | For scenarios where you’re sheltering in place or staying at Meeting Point 2 |
| 3–7 Days | Extended food supply, portable water filter, battery-powered or hand-crank radio, personal hygiene basics, children’s comfort items | Most families never need this, but it’s worth having for major events like prolonged power outages or regional evacuations |
One thing I always include that most lists skip: a physical copy of your home’s floor plan with exit routes marked. It sounds unnecessary but when a room is full of smoke, knowing exactly which window is closest to the ground matters.
📋 Generate Your Personalised Safety Checklist
Not sure what’s missing from your current setup? The Home Security Checklist Generator builds a personalised plan based on your property and household in under 3 minutes — free, no signup.
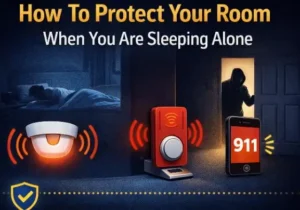
Step 6 — Layer in Your Home Security (Often Overlooked in Safety Plans)
A family safety plan for emergencies is incomplete without addressing the physical security of your home. Not just for intruders — but because a home that’s properly secured also reduces the risk of secondary incidents during emergencies. A door that’s easy to breach is also a door that won’t hold during civil unrest or that an intruder can use while you’re evacuating.
I approach this as a layered problem — outdoor detection first, then entry points, then internal alerts. Here’s how I break it down for most homes:
Outdoor Detection Layer
Motion-activated lighting is the cheapest and most effective deterrent you can install. It works for intruders, but it also gives you early warning during night-time emergencies — if something is happening in your yard or driveway, the light alerts you before it becomes a confrontation. I have a full breakdown of the best affordable options in the 7 best motion sensor lights to deter burglars post.
Entry Point Monitoring
A video doorbell at the front door gives you visibility of who’s approaching before you open it — useful in emergencies where you need to verify who’s outside before letting them in. The complete doorbell installation guide covers battery-powered options that need no permanent wiring — important if you’re renting or want a fast setup.
Camera Coverage for Wider Awareness
In an emergency, knowing what’s happening outside without having to physically check is valuable. Perimeter cameras give you that. They don’t need to be expensive — I put together a full guide on setting up an affordable system without drilling or professional installation: complete CCTV installation guide for 2026.
Step 7 — Practice It. Seriously, Practice It.
This is the step that separates a real family safety plan for emergencies from a document that collects dust. I do a walk-through of our plan twice a year — once in spring and once in autumn. Not a full drill every time, but at minimum a sit-down review and a check of the physical setup.
Here’s how I structure each review session:
- ▸Contact check: Verify all phone numbers are still correct. This catches more gaps than you’d think.
- ▸Kit rotation: Check expiry dates on food and water, replace medications if they’ve run out, swap out seasonal clothing if needed.
- ▸Role check: Has anyone’s routine changed? New school, new job, new neighbourhood? Update accordingly.
- ▸Scenario walk-through: Pick one scenario (e.g. fire) and talk through it step by step with every family member present. Ask the kids what they’d do. Listen to what they get wrong — that’s valuable data.
- ▸Physical drill (once a year minimum): At least once, actually walk the exit routes, physically locate the emergency kit, and go to Meeting Point 1. Not talking about it — doing it. This is what builds real memory.
“Kids who have physically walked the exit route once can do it in the dark under stress. Kids who have only heard about it often freeze. Muscle memory beats mental notes every time.”

The One-Page Family Safety Plan for Emergencies Template
Everything above should collapse into a single printed page that every family member can understand at a glance. Here’s the format I use — you can copy this directly and fill in your own details:
🛡️ Our Family Safety Plan for Emergencies
MEETING POINT 1 (Near Home):
[ Street corner / neighbour’s gate / driveway marker — be specific ]
MEETING POINT 2 (Away from Area):
[ Full address of secondary location ]
CONTACT CHAIN:
1. [ Parent A name + mobile ]
2. [ Parent B name + mobile ]
3. [ Trusted relative + mobile ]
4. [ Neighbourhood contact + mobile ]
IF PHONES ARE DOWN:
Go directly to Meeting Point 2. Wait up to 4 hours. Then contact [ extended family name ] at [ number ].
EMERGENCY KIT LOCATION:
[ Hall cupboard / garage shelf / laundry room — be specific ]
CRITICAL MEDICAL INFO:
[ Name + condition + medication + location of medication ]
Last reviewed: ________ · Next review due: ________
Print this, laminate it, and put one copy inside the front door, one in each adult’s car, and one in the emergency kit itself. The goal is that even a child old enough to read can pick it up and know exactly what to do.
How to Score and Improve Your Current Safety Readiness
Once you’ve built your family safety plan for emergencies, it’s worth getting an objective view of where you actually stand. Reading a guide and feeling prepared isn’t the same as actually being prepared. A few tools I recommend for this:
These tools take 5 minutes each and give you an honest, data-based view of your situation. I’ve found that most families who go through them discover at least two or three gaps they hadn’t considered. That’s not a failure — it’s the point. Better to find those gaps now than during an actual emergency.
What Preparedness Experts and Official Bodies Say
It’s worth knowing that official guidance on building a family safety plan for emergencies backs up most of what I’ve described here. FEMA’s preparedness division has long advocated for household-level planning that covers multiple emergency types, not just one, and emphasises communication plans as the most critical component.
Their guidance and downloadable resources are free and worth bookmarking: Ready.gov Family Communication Plan gives you a structured template that aligns with federal emergency response systems — particularly useful if you’re in the US.
For those outside the US, the Red Cross Emergency Preparedness Plan is a widely respected resource covering both household planning and community response. Their approach to “shelter-in-place vs evacuate” decisions is particularly well thought out and worth reading alongside your own plan.
Final Thoughts on Your Family Safety Plan for Emergencies
The goal of a family safety plan for emergencies isn’t to cover every possible disaster in exhaustive detail. It’s to give your household a shared framework that reduces panic, improves coordination, and gets everyone to safety faster than they would without one. Simple and practiced beats complex and forgotten.
Start with the scenarios that are most likely for your area and your household. Build the communication tree. Pick your two meeting points. Put together a basic kit. Print the one-pager. Walk through it once. That’s it — you’ll already be better prepared than the majority of households around you.
Then, twice a year, review and update it. The plan you have in five years will be better than the one you start with today. The only real mistake is not starting.
| Step | Action | Time to Complete |
|---|---|---|
| 1 | Map your emergency scenarios | 30 mins |
| 2 | Build your communication tree and print contact cards | 45 mins |
| 3 | Agree on and physically visit both meeting points | 1 hour |
| 4 | Create and store your separated-family protocol | 20 mins |
| 5 | Assemble your emergency kit by tier | 2–3 hours (shopping + packing) |
| 6 | Add home security layers (lighting, doorbell, cameras) | 1–2 weekends |
| 7 | Print the one-pager and do your first walk-through drill | 1 hour |
| Ongoing | Review and update twice yearly | 30–60 mins per session |
The total time to build a solid family safety plan for emergencies from scratch is roughly one weekend. That’s a small investment for something that genuinely matters when it’s needed.

Borni Franklin is the founder of LotsHomeGuide and a home security researcher with over 5 years of experience studying real-world burglary patterns, property vulnerabilities, and practical protection strategies. He has tested home security products, analyzed how intruders select targets, and built free tools to help everyday homeowners assess and improve their safety. Every article on LotsHomeGuide is written from hands-on research — not recycled generic advice. Based in the USA. Read full information about Borni Franklin on our About Us page.